On-Screen Feedback for Desktop Automation
Description
Nexial supports on-screen feedback during automation so that Nexial user can be better informed of the progress of the automation. This is especially useful when a specific step or a series of commands do not result in some form of visual changes in the target application. Consider the following example test automation script:
1.  Open application `X`.
2.  Open form `Y`.
3.  Fill in form `Y` to pull up desired record.
4.  Validate that `Field 1` has the expected value.
5.  Validate that `Field 2` has the expected value.
6.  Validate that `Field 3` has the expected value.
7.  Validate that `Field 4` has the expected value.
8.  Validate that `Field 5` has the expected value.
9.  Validate that `Field 6` has the expected value.
10.  Validate that `Field 7` has the expected value.
11.  Validate that `Field 8` has the expected value.
12.  Validate that `Field 9` has the expected value.
13.  Validate that `Field 10` has the expected value.
14.  Close form, close app.
A simple automation as it would seemed. However, it is unlikely that there are any visual changes to the application during Step 4 through 13. In order that Nexial user can stay informed and a better sense of what’s going on, Nexial can optionally _flash _on-screen feedback of the command as each of them are being executed. For example,

The above screenshot shows a “balloon” being displayed at the bottom-right corner of the desktop. This is the on-screen feedback that is integrated into Nexial. As each command is executed, a new feedback is generated.
Note that the on-screen feedback will automatically hide after 5 seconds. The on-screen feedback feature is optional. Next section will explain how to enable this feature.
How to Enable On-Screen Feedback
- Enable
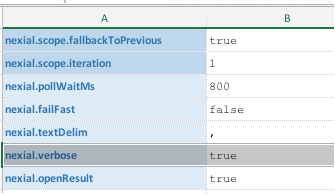
nexial.verbosesystem variable, like this:

For more details about this or any system variable, visit theSystem Variable page. - That’s it! Run your test as you normally would.