Database Automation
Section 4: SELECT to validate
Here are some ideas and examples of what one can do with the execution metadata and resultset in terms of validation.
Example 1: Ran with failure?
After the query has been executed, we want to ensure that there isn’t any unforseen error raised by the target database
server:

Another variation to this would be using flow control. For example:

Example 2: Running late…
After the query has been executed, we can evaluate the time spent in execution as a form of validation such as
“this SQL must return within 1 second”:

For immediate failure and termination of current execution, be sure to set nexial.failFast as true.
Example 3: Verify data “dimension”
We can also verify the “dimension” of the resultset - namely number of rows and number of columns. This would give us a
quick (albeit inexact) way to ensure we are looking at the right thing. In addition, we can also inspect/validate the
column names of the resultset as a list:

In this case, the expected columns (${expected columns}) would be
CUSTOMER_COMPANY,CUSTOMER_NAME,CUSTOMER_EMAIL,REP_TITLE,REP_NAME,REP_EMAIL,Country
Example 4: Data, Row by Row
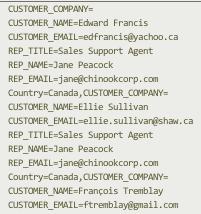
To validate data, we have a number of ways. First, it is important to note that while ${results}.data represents the
entire resultset, the its textual rendering is in the form of “name=value” pairs, such as:
Now let’s consider the following example:

The example above depicts technique to validate against the entire resultset, against a row and against specific cell.
against the entire resultset
To validate that the expected data is found in the resultset, we would assert the expected in the form of
column_name=column_value. The second line in the script above reflects this strategy.
against 1 row
Similarly, to assert against a row of data, we would apply the same strategy. The third line in the script above shows the same.
against a specific cell
To validate against a specific cell - meaning a specific column in a specific row - we can use the exact value of the
expected against that specific cell via the ${...}.data[row_number].COLUMN_NAME. See the last line in the above
script for example.
Example 5: Data Column-wise
We can also validate the resultset column-by-column. This means to extract the data of the same column into a list.
Nexial provides the ${...}.cells[COLUMN_NAME] syntax to accomplish this:

Line 2 shows the extraction of the data - as a comma-separated list - in the column Country. We can then validate
this list against a known (expected) list. In addition, we can further manipulate this column-wise data list via
Nexial Expression, such as distinct (to remove duplicate data) and ascending (to sort the list in ascending order)
and descending (to sort the list in descending order).