Setting Up Your First Project
Creating Your First Project
Creating Project Structure
-
Open the command prompt and change the current directory to the "bin" directory under the Nexial
installation directory. To do this,
- type
c:and ENTER - type
cd C:\projects\nexial-core\binand then ENTER
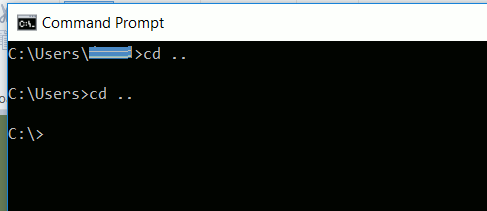
- type
-
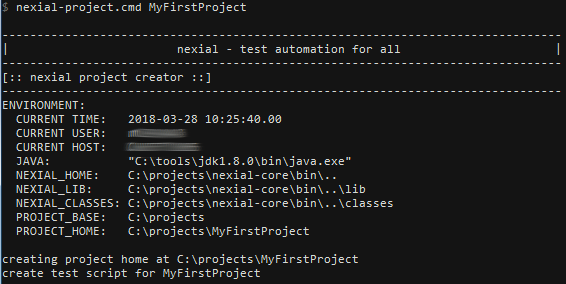
From here, let's create a new Nexial project via the
nexial-projectutility.
At the command prompt, enternexial-project.cmd MyFirstProject -
If everything works, then you should see the message
creating project home at ...andDONE
-
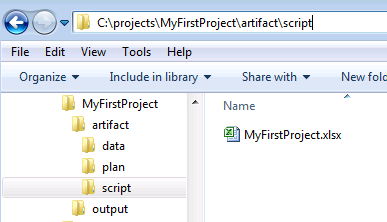
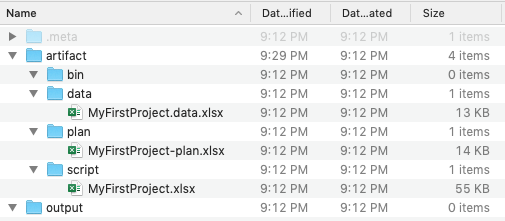
You should see the following directory created, along with various files in it:

Additional References
- To gain better understanding of the project structure, check out Understanding Nexial project structure
- To gain better understanding of the Nexial automation script format and usage, check out Understanding Nexial Test Artifact
Now it’s time to run some automation!
Running your first test automation
The “Hello World” of Nexial automation
-
Open
C:\projects\MyFirstProject\artifact\script\MyFirstProject.xlsx(Windows) or$HOME/MyFirstProject/artifact/script/MyFirstProject.xlsx(Mac) created in the previous process - we refer to this Excel file as the test script or the automation script. By convention all Excel files under theartifact/scriptdirectory are considered as automation scripts. - Start the first test case by doing the following:
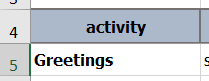
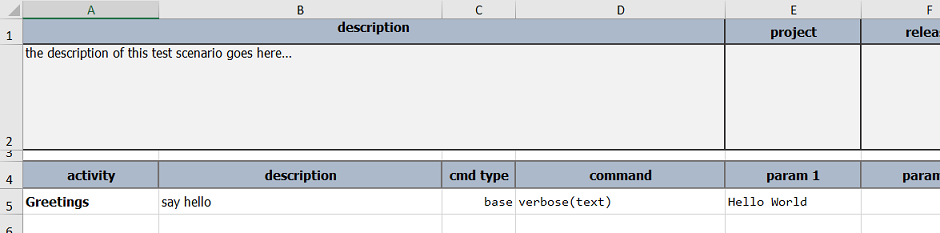
- Enter “Greetings” under the activity column. This column’s purpose is to group a series of actions
with a meaningful name.
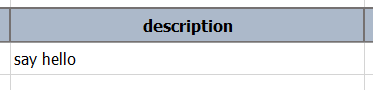
- Under the description column, enter “say hello”. This column is used to contain the description of what the
corresponding action should do.
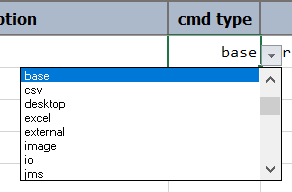
- In the cmd type column, there should be a drop down menu. From this menu, select “base”. This column
organizes and specifies various types of Nexial commands.
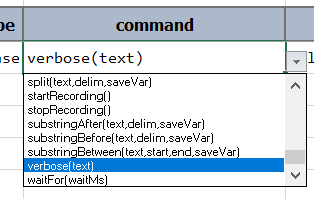
- In the command column, you can now select a new command from the drop down menu. The commands you can
select from in this column come from a Nexial list of commands labeled as “base” commands due to the type of
command we selected in the cmd type column from the previous step.
For our first script, we will select,verbose(text).
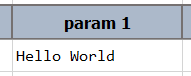
- In the param 1 column, type in
Hello World. This column as well as the other param # columns are parameters that you fill in based on the command column’s required parameter. In our example, the “verbose(text)” command requires text as a parameter.
Your project should now look something like this:
- Enter “Greetings” under the activity column. This column’s purpose is to group a series of actions
with a meaningful name.
-
Save/close this automation script.
- Return back to the command prompt and type:
nexial.cmd -script(leaving a space before and after-script). Either,- Manually type the location of
MyFirstProject.xlsxfile that we were working on -
(Windows)C:\projects\MyFirstProject\artifact\script\MyFirstProject.xlsxor
(MacOS)~/MyFirstProject/artifact/script/MyFirstProject.xlsx - Drag and drop the xlsx file into the command prompt. After doing either step 1 or 2, press Enter and wait a little bit.
- Manually type the location of
-
If all’s well, you should see something like the following on your console:
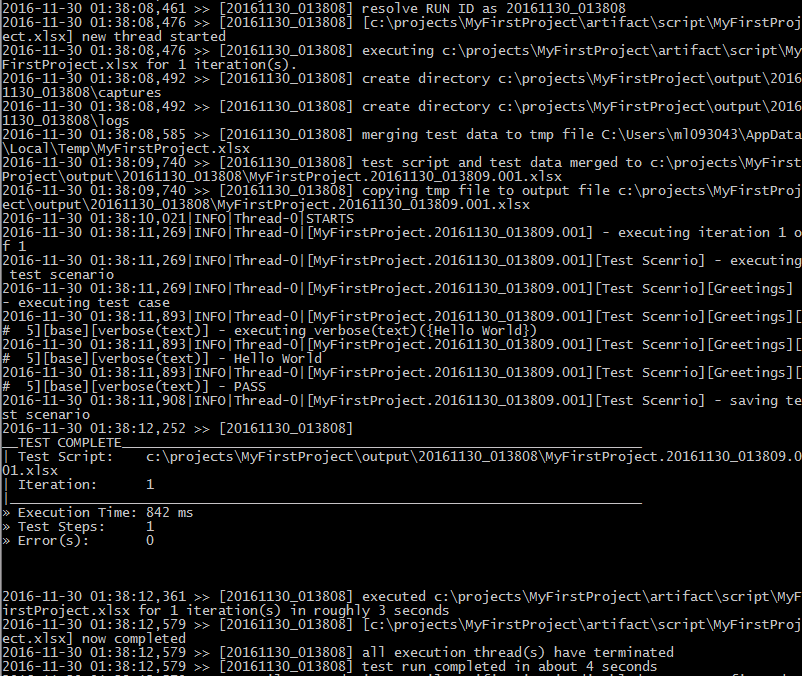
For now, don’t worry too much about these logs. The most critical portion is near the end where Nexial reports a summary of the test. The above screenshot showed that 1 iteration ran, with 1 step completed within 842ms.
- After the above finishes processing and if your “artifact/data/MyFirstProject.data.xlsx” file (Excel file
located in the “artifact/data” folder) has
nexial.openResultset astrue, two things should open up:- An Excel should open a new spreadsheet displaying the output of the test you just ran.
- Your main browser should open up a web page with the execution summary of the test we just ran.
The new Excel file should look something like this:

Meanwhile, your browser should display something like this:
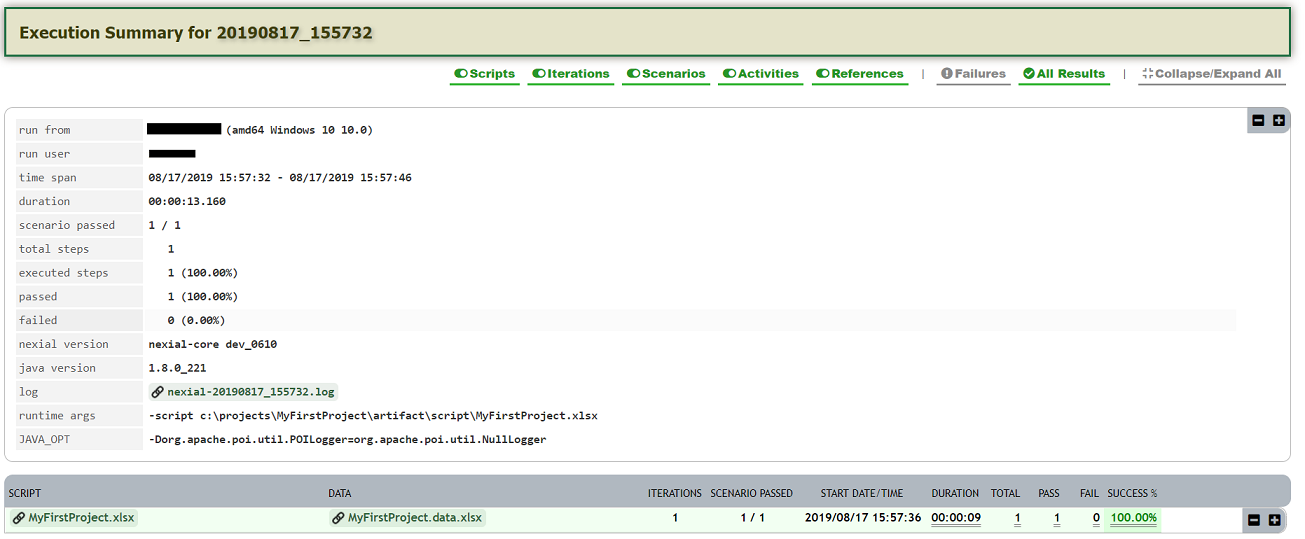
Congratulations! You have just successfully run your first automation script via Nexial. Let’s dig deeper…
a little bit more…
- let’s create a few more lines for this test case: MORE TO COME…
Diving Deeper
- install .NET Framework 4.6.2 for desktop automation